Tuesday, 19 January 2016

modeling hands

For this I had to use the female reference as a guide line, then I carried on with the YouTube tutorial shown bellow:


The references I used was placed on maya (similar to how I placed the anatomy head on maya for the head) and then followed in with the shape and patterns. I mainly used the front and side view to change the angle and position of the model to make it accurate and realistic. 


Creating the fingers was the easy part. For this I had to use a cube object, change the edges to 8 and stretch it in the length that would be a roughly a human finger size. I then got rid of the flat end and replaced it with half a sphere. This was to be the tip of the finger. Once I connected the two together, I had adjusted the divisions to 4 and matched the finger to the reference. I moved the edges and extruded them to make the nail and shaped the finger until I was satisfied. Finally duplicating the fingers and (one for the thumb) I attached them together and changed the lengths slightly. 

This was the final result of my modelled hand on maya. This model focuses on the male hand, which was what I needed for my Viking statue. 

3d model beard

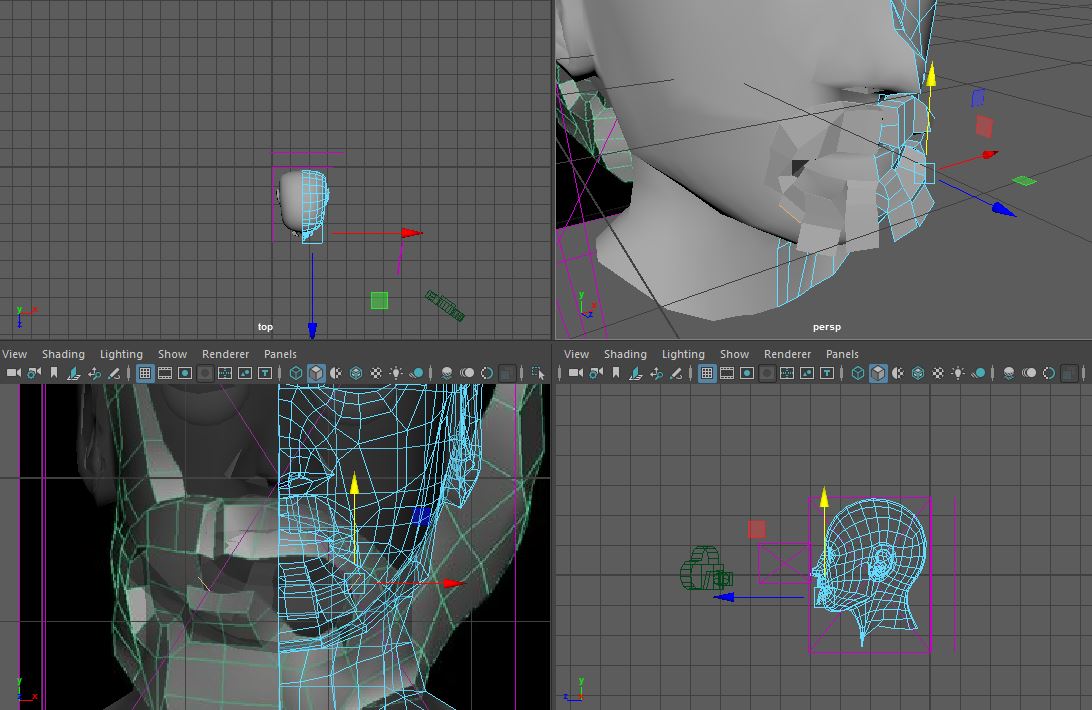
This was continuing with the face model that I completed during class. However for this I had to include a beard for my character.  This did take a while to do, but with a little bit of referencing and a lot of extruding faces and edges, I was able to form the bear that I was looking for.

This was the reference I had used to help me gain a better understanding on how to form a beard for a statue. The link is where I found it.

Monday, 18 January 2016

Fish sketches

Inspired by last weeks lecture from Mike McCarthy, this week’s classwork was to produce some concept ideas for a mutated fish creature. The idea could be humerus or serious.

Moodbaord and rough Ideas:

More ideas:


Sunday, 17 January 2016

3D character statue design

Moodboard:
The theme that I will try and continue with will be on Vikings. This will involve adding a god like statue fit for a Nordic/Viking Battle arena.

Sketches and idae for Statue:
This is to be my idea for a statue. This is my interpretation on the Viking God of Thunder 'Thor'. I thought this statute would fit my battle arena well, as it is based on a Nordic/ Viking area. 
Might consider to make him sit on a throne. Depends how confident I am with time and my modelling technique.


Idea of proportion and stature from Thanos:
Using the images for model of Thanos sitting on his throne. This could be useful for my Viking Statue on his throne. The most important thing about these images are the posture and build.
http://www.popcultcha.com.au/guardians-of-the-galaxy-thanos-on-throne-1-10th-art-scale-statue.html#.VpwqLSqLSUk

My Final Design for My Statue:
This is to be what my statue character is going to look like. He is very much all muscle an little to no amour. However he will have a huge hammer and will be sitting on a thrown, looking down at the warriors who will fight in front of him. He will have a shoulder pad (with a chain) and shin pads as armour.

Muscles in Anatomy

Following on from studying skeletons, the next step was to study and understand muscles. This allows me to create the structures and mechanics of figures and characters. We where given a 2 week timeline to complete all this. First week is to be sketching and research on the muscles.

Once again, I used the 'Anatomy lessons from the Great Masters' book, simply because it is the best source I could find not only to study the muscles, but to draw them. 

My Sketches:
Like my skeleton sketches, I used pencil to draw these and made notes of what the muscles are called and where they are located in the human body.


My Photoshop Work on Muscles (front and back):

with muscle information:


Wednesday, 13 January 2016

Life Drawing week14:


This part seems a bit familiar. Coincidently enough we had a project on the human anatomy and how the body works. We even had to design and label our own drawings on anatomy. Well for this session we were put to the test. Once we had drawn the model,  my tutor would call out a bone and muscle  name, and we would have to label where that name is on our drawings. Just as well we had practice...

For the last thirty minutes of the lesson we where told to draw (in detail) our own hands to try and get a better understand on how to draw body parts.


Hands are well known for being hard to draw, then again drawing a person is hard in my book. But I managed to get a few sketches done of my own hand. One positioned at the front of the hand, then the side of the hand and finally the palm. I was very pleased with myself as I thought doing this would lonely lead to disaster, guess I was wrong. I was even complemented from my tutor on the drawings I had done.


Tuesday, 12 January 2016

Idea for a 2D game

Groups and  Boardgames:
Now returning to a new game for gameplay and interactivity, this time in 2D form, we were split into groups and I formed a team called Wildcats Studios with James, Charlie and Harley. In these groups we had to create a board game. At first I thought this task was a little off topic, however this was a good chance of my group to learn off each other and give each person the chance to form their own ideas. The little board game we made was fantasy themed, with a similar style to monopoly. Four players are set in different corners of the board and those corners where to be their home. Every time the player goes past their home, they would gain a chance card. Whist going round the board the player could land on a monster and would have to roll the 6 sided dice, if they got a 6 they would be given an item card which had different weapons for the player to use. Finally after a player goes past their home 4 times, all of the players would have to choose which person they will fight against. Using their item cards and the dice, it would be a showdown. Whoever got the highest points would win the battle. Each player had five lives. If they loose five battles, they are dead.

I found this exercise really helpful and gave me a better understanding about how to work and form ideas as a group.

2D game idea:
After the board game session, we had to go off and (with our groups) plan what our game will be an how we will present it for next Friday's lesson.

^40E8467A5C6A382C6040FCEEC811EFC8B57D747885BFA0DAC4^pimgpsh_fullsize_distr.jpg

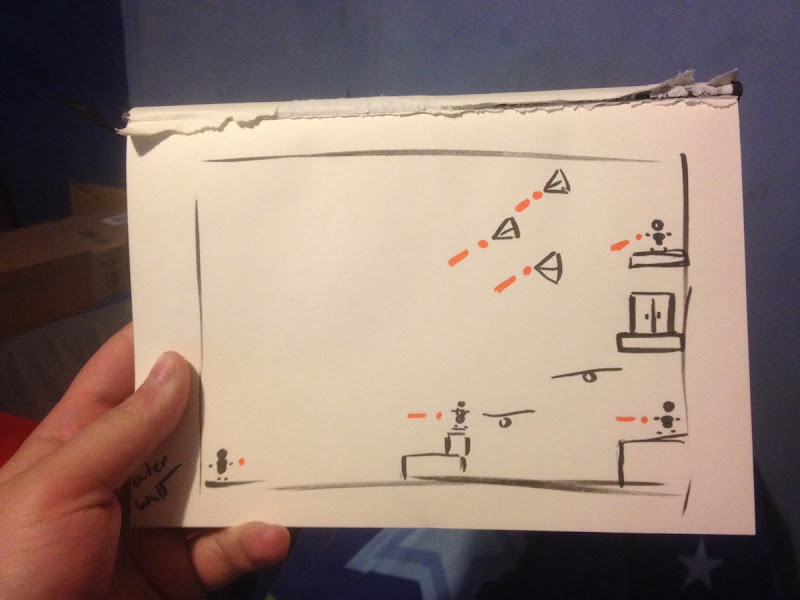
This basic drawing is a rough idea of what my team and I wish to create. A 2D shooting game.