Monday 29 February 2016

Wild West


This session was to focus more on the composition of the  painting. We had to create a rough speed paint design inspired by the supplied desert house image (image shown bellow) , but the key elements for this task is to change the desert house into a landscape background using the rule of thirds.

What I did after 1 and a half hour:


Friday 26 February 2016

Colour Theory

The task was to use the colour theory that was given, colour/paint over the 2 versions of Yoda in the attached images. 


The first one (on the right) is to paint over Yoda using a downbeat, desaturated Complementary colour scheme. In other words, use 2 colours opposite each other on the colour wheel. This one was to be low saturation.


The second one (on the left) was to paint over Yoda to create a more upbeat, medium saturated Analogous colour scheme. In other words to choose a group of colours next to each other on the colour wheel.


Wednesday 24 February 2016

Life Drawing week 19:

Another day, another life drawing session. For this lesson we focused back to perspective drawings. To help us with drawing out the figure's positions, we had the A4 papers with crosses, placed around the model. This would give us a better understanding on how to draw the model's position and the objects around him. 


Very much like last time, this was an interesting and effective way to draw the model ,whilst having objects around him. I managed to get a good few drawings out of this, but I was a little bit disappointed with the result for the last piece, as I felt it was a weak drawing. But neither the less I was pleased with the other drawings.

Tuesday 23 February 2016

Using xNormal and Quixel for statue texture

Quixel was a huge help for my texture issue. I was finding it hard to work with a realistic texture on Photoshop so if anything, this was a huge improvement to my previous attempts
It wasn't easy to learn Quixel, in fact I still struggle with it now and again. But as you can see from the result, it can be rewarding. The first thing I had to do was to import my Zbrush statue file onto xNormal. Using the Low and High poly versions, I was able to then change the settings to normal map and albedo map before finally baking the UV's. After completing this I then opened Quixel and used the different UV maps. Placing them onto Quixel was the easy part. It was just finding the right texture that took time.

Statue Diffuse Map:

Statue: Zbrush low Poly:

Statue Normal Map:

In the end I chose the stone-statue texture and added lightly on Photoshop snow in the cracks of the statue. It is finally finished. My texture for the statue was complete. Just have to finish the textures for the armour, hammer and throne and rig my statue in position and then it will be good enough to be place it with my battle arena.

Monday 22 February 2016

Putting Statue in Zbrush

After making a cube on Zbrush in class it was time to put the practise to the test. For this task, I was to do the same technique with my cube on Zbrush, but this time instead of the cube, it was for my statue.
 So as I said before this is going to be a repeat of what I did with the cube to place it onto Zbrush. 
The plan is to export the finished model (UV mapping needed to be neatened) as a OBJ. Then we had to import it onto Zbrush (just like the cube we practised on). Once I began to model; using a soft brush for the muscle form, crease brush for the cloth and belt (also we downloaded a cracks and chip brush), that's when the muscles and detail in the clothes began to take form.


Image showing that my statue is taking form in Zbrush.

I then had to save it as two separate files. One showing the Low Poly model and the other showing the High Poly. This will come into play for using the xNormal program. There I will plan on baking it and gaining all the different UV maps I will need to give my statue detail (perhaps even texture).

Final Zbrush models:
Low poly version:

High poly version:


Practise using Zbrush with cube

For this lesson, it was our chance to check out a new modelling program, Zbrush. This will become an option for us to use this program to make our statue characters look better. However before using it for my statue ,we started with something simple. We used a cube from Maya and had to change the divisions to make it smoother. We then had to save it as a OBJ file and import it onto Zbrush. Once doing so, we then clicked on edit and was able to add cracks and shapes onto the cube. The cracks brush was something we downloaded during the lesson (this will come in use for our statues). We also practised using colour to make our cubes look more...interesting. 


Once that was finished we had to save the low poly version as an MTL. We then increased the poly count of the cube to a higher poly version and did the same thing. After that we practised using a program called xNormal and was able to bake the high and low poly to a normal targa file. When this was complete, we where able to use Quixel and the texture from Zbrush would show on Photoshop.

Friday 19 February 2016

Adding lower part to staute

 Instead of going for just bare feet, I decided to change the plan and formed the boots of my Viking statue. This would take less time, easier to model and is part of the original design for the statue anyway.
Feet: (boots):
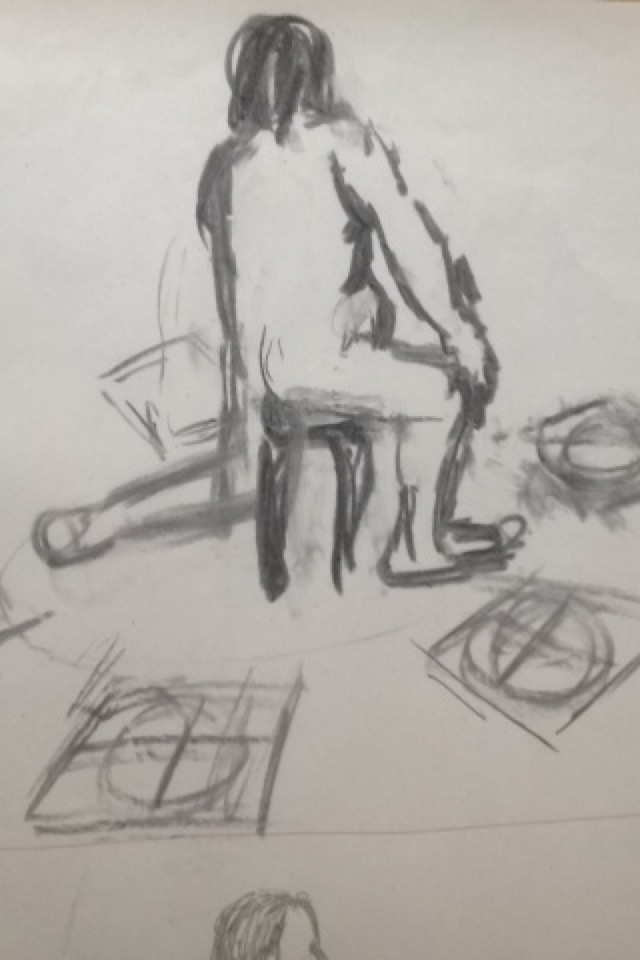
To make the feet and lower body, I had to follow the reference I used (shown bellow) and extruded 9 to 10 faces to make the form of the hips and legs. I then played with the vertex's using the side view point camera, and positioned them into the right places. I considered making the boots on a separate Maya file, but whilst making the legs I thought it was best to continue by extruding the faces outwards. Fianlly comes the soles. For that I created two cubes, changed the faces and vertexes, and combined them to the statue.

Reference used:

Full body put together. At long last. 
Thought this wasn't the best way of modelling legs and feet, it was a lot easier and quicker, which is what you have to do sometimes. However I am sure I will improve the look of my statue by using Zbrush next week.

Wednesday 17 February 2016

Life Drawing week 18:

The first ten minutes of this session was to do a quick 3 minute drawings of the model.
This was another experimental way of drawing. For this we had to choose two different types of colours and had to use them for drawing the model.  For one colour we focus on drawing out the shapes, and for the second colour we would focus on the tone work. We did this a few times and tried to use different colours. I chose red and blue to balance the drawing out.


More colour sketches:


Monday 15 February 2016

Star Wars Sketch in 2 point perspective


This lesson we used the supplied star wars speeder blueprints create a sketch in 2 point perspective. we got some examples and information on how to try and approach this sketch.


My sketch:


Sunday 14 February 2016

Insect character designs

For this homework I was to create an original design concept for an “insectoid” character, in the game genre and style of my choice. So this could be for example a fantasy based character or monstrous, intelligent. 


sketches:
These were my sketches for my insect character. I plan for the character to have a weapon and show it to be a bulky warrior.


Final 3 point sketch:  
Rough colour for final:

Final design:
This is my colour concept art of the character in a three-quarter view. This shows a dramatic pose but still needs to clearly convey the design of the character. This was done in Photoshop.


Friday 12 February 2016

My background design remake

Using this image from the game Fez, this would be my guide for taking my concept art backgrounds and turn them into a more 2D pixel art style.


So I tried this style out for my sci fi room (scene 3) and this was the result. 

Concept design:

Remake to 2D Pixel art idea:

Final Design:

Wednesday 10 February 2016

Life Drawing week 17:

This sessions life drawing was to focus on perspective once more. However this time we had the model stand behind a wooden cage and was told to mainly use the cages gaps as a guideline to help with propositioning the model.


Though this was a little hard at first I got more and more used to drawing the cage and model, and as this happened the drawings where given more detail and looked more realistic. Though my personal favorite was the 3rd image, where the model was sitting down in the cage. I surprisingly got the shapes right and the cage didn't look unnatural.


Monday 8 February 2016

3 point perspective


3 point perspective is very similar in construction to 2 point perspective but with a third vanishing point for the lines that are vertical in reality, to give an impression of height when the viewpoint is looking up or looking down.  For this session we will try to find the vanishing point of a 3 point perspective.
Images used for 3 point perspective:


making the vanishing point:


Now that I have an understanding of 3 point perspective, it was time to put practice to the test. For the last hour of the lesson, I used my 2 point perspective design of the sci fi room and changed the positions and size of the objects in the room as well as the angle of the room.
 
Remake your room into 3 point perspective:


Comparing and changing the rooms perspective form 2 point to 3 point: