Friday 30 October 2015

Zombie character

Since it's near Halloween it was time for some creepy designs for our first attempt on making a zombie.  However this time we will be using both Photoshop and Maya to try and make the zombie move and animate the movement. We used Photoshop to design the figure, adding different colour and texture to the skin and clothes. Whilst doing this we had to also find a female face (or male or animal) and added a different and creepy look for the zombie.


I added red and yellow eyes whilst also having blood dripping out from her face and eyes, and scars across her face and shoulders.


Finished Zombie animation

Wednesday 28 October 2015

Life Drawing week 6

This time for life drawing we where practising more with getting a bit of tone and curves into the drawings. I do think that I am getting a lot better then when I had started the course, however there is still room for improvement. such as my drawing of perspective.  I always seem to be a little bit slow and sometimes get the length of the models legs wrong, which can be a little frustrating but I'll just have to practise more.
 for this drawing i tried to be a little adventures and tried to mirror the figure, unlike the others who copying there stronger hand drawings. Yes mine is less pleasant to look at, but at least I tried.


Tuesday 27 October 2015

Creating mushroom and foliage


Mushroom:

From last weeks lesson we learnt how to make a hilly background model. But this time we where modeling mushrooms. However there are one of two things we had to do in order to make this mushroom.  


Foliage:

making grass and leaf:
making a flower:


making a bush:

Sunday 25 October 2015

Lava creature

Now that I am becoming more skilled with photoshop, it was time to create more creatures and monsters. This time I was to practise on designing lava creatures with using glow effect on Photoshop. This was by far a more exciting technique to learn than the pixel art drawings. But still challenging. 

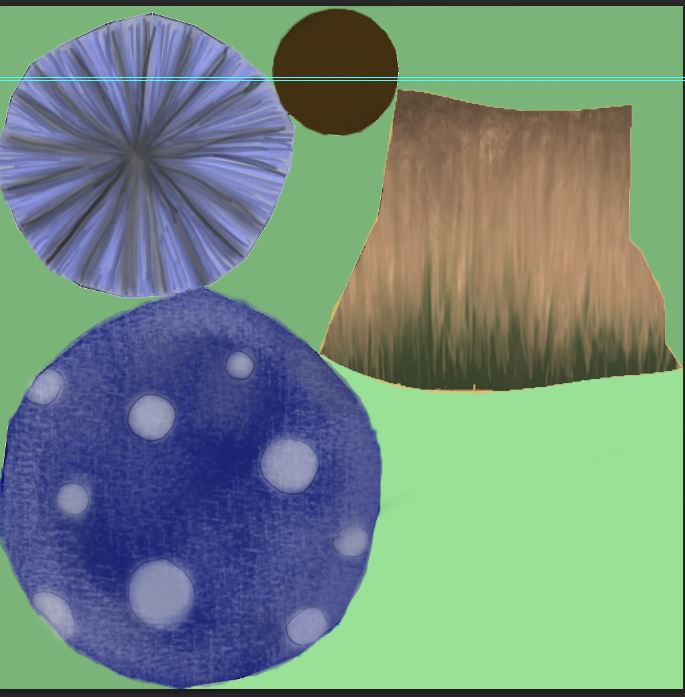
I was firstly told to try and get the hang with creating a lava effect. So the class was to draw lava coming out of a crack. The deign of the crack was simple enough, just had to create a dark patch and changed the opacity to make it lighter and lighter. The lava itself, however was to be done by drawing the crack in orange (on a separate layer). Then I clicked on "FX" and added inner and outer glow. Inner to be yellow, and outer to be red. Lastly I added a bit more texture on the lava to make it seem to be a thick Liquid, (as lava is). For this I clicked on FX again and used dotted texture for the inner glow effect.


The second part do the lesson, was to get used to making lava cracks on a rocky monster. So we added an image of a model of a rocky monster onto Photoshop, created a separate layer, and made sure the brush tool was thin. This was to not over due the the effect in which it would become obvious. Both of these techniques I got used to very quickly and was having a lot of fun with it. But for the homework I was put to the test to see how good I can be with lava, by creating a lava creature.


Moodboard: 

My first moodboard was to research the basic form of lava. 


The second moodboard was to research on other lava creatures. 


I now had looked up on simple forms of lava, while also having a few ideas of what my lava creature would look like, so it was time to start drawing.
As you can see from the pictures above, I managed to draw a few designs, such as the volcano monster, and the two Rocky-lava flowing monsters. I was even brave enough to draw another concept drawing on Photoshop, though with less rewarding results.
This was to be my final attempt at creating a design for my lava creature, and it's safe to say that it was one of my best work so far, possibly because I just got more engaged with the task and was determined to do a rough drawing, then a rough on Photoshop, and lastly the final outcome. This final creature had to be done using a lot of layers on Photoshop, and even though I feel I could have done better with the rock texture and maybe added more cracks, it still looks recognisable and rough (like rocks should be). Yet another skill I have learnt to add to the list. 


Thursday 22 October 2015

Adding texture and detail to Battle Arena

So far I have managed to create a simple grey box for my battle arena whilst adding a bit more detail to it, as well as giving it a bit of texture. For example instead of my original plan of having a full cave covering the top of the level, I thought it be best to show some gaps and holes for the player to go down in. This would make it more like a ruin by having a worn down-like cave and inside it, a worn down temple. As for texture I thought of editing my green landscape that I did in class and changed it to winter snow. Now as you can see, the snow is showing on top of the cave and floor.  
I hope to add some more texture to the arena, such as blue winter flowers and rocks. Though I am having a little bit of trouble with getting a perfect texture, it is beginning to come together.

Testing it on Unity:

This part was a bit of a mess. When I tried to put my 3rd person character into my game, there was always something blocking him or stopping him form moving, so I though it was to do with the characters size, which did help, however I looked again and found out that bits of the arena seemed to crowded and full with no way of getting across. To sort this problem out I will need to change a few things on my greybox in Maya. Hopefully this will give a better result. 

Wednesday 21 October 2015

Life Drawing week 5

This lesson today was very entertaining. And it showed. This these where my best life drawing drawings so far. We did the same thing as we had done the week before and hand to draw the model whilst he was moving. I came up with good results.
For the second half of the lesson we had to draw the model with a white charcoal. To do this we had to cover the page in black charcoal and using the white we begin to draw the model. 


It is great to see that I am getting better with my model drawings. I have pleasantly of time to improve as always but it will not stop me form being happy with todays results.


Monday 19 October 2015

Creating landscape texture

Now this is where things begin to get really interesting. The main strength of how my battle arena will look, should be based on the white Nordic landscape, as well as the inside of the snowy ruin. So this was the perfect opportunity to experiment on what we had done in this lesson, which was to create a few green hills and rocky grounds. Similar to creating a rock, I smoothed and increased the plane ground and this added shape to it and made them it look a lot like hills. And similar to the barrel, I used hypershade window and added a image from Google to add the green grass and grey rocky textures.  


Instead of having green hills I though of changing the to rocky, snowy mountains. I did this by changing the texture by using a snow texture I found on Google. 

Thursday 15 October 2015

Adding more to Greybox

Whilst I 'm working on my building for the walking simulator 'Patient 201', I have decided to add a few extras for it. So for example rather than simply having a few dull rooms with plain walls, I added clocks and eyes. Each of these will have an impact on what the player will be feeling, as well has helping them solve the puzzle of how to open the doors.
Examples of things I added

The room on the 1st floor would have clocks all around. Yet one of them will not be working properly. The reason for this is because the arm for the clock that doesn't work is the lever for the elevator. A similar example can be seen from the bottom floor with the eye room. The Eyes on the bottom floor will have a button as the pupil. The eyes would also have a sign giving the player a clue. For example "I've got my eye on you". Once they have pressed the right eye, the door will slide open from the tunnel for the player to get top the computer, to open the exit doors. The final idea I added to my simulator was activating a secret room. For this, I thought of adding a lever in a shape of a candle light which when turned will open up the fire place and reveal a room with a secret note.


I thought these ideas would make my simulator seem less dull and give the player time to think about how to find a way out of a creepy, mad house of an asylum.     

Pixel art

This weeks work was to practise on pixel drawings. This was to be a simple task. However it was much harder then I thought to perfect it.

 Firstly we had to change the paint brush to a pencil brush and had to change the pencil size to '1'. Then we practised on drawing a 3D cube. To make this we had to zoom in close to see the pixels 'squares' and using this view we draw a diagonal line in two's. We had to make 11 of these and in doing so we managed to make the line. Doubling that line, then reversing it, we made a pixil darwing of a cube. Once we finished the quick exercise of drawing a cube, we then moved on to downloading a pixelated art picture of a toy maker with his toys. Our task was to make a toy and blend it with this image.  I got to work on drawing my toy robot.  


Using my cube as a starting point, I felt confident in repeating and re-using similar shapes, such as rectangles and squares. This would be good to work on the body of the toy robot.  Once I was satisfied with the shape of the body, I went on to colouring it in. 
  

I started with the body (to my regret as I wished I started with the head colour), and used blue with red and white buttons for it. The feet, eyes and stripes on the arms was to be red. Finally the face was to be green. When I had finished the drawing, I placed the saved image of the toy maker onto Photoshop and used it as the background layer for my robot. I then highlighted my robot and then shrank it to fit the other toys. The top image was my first attempt. Though it seemed to have stood out form the other toys. So I later added lighting on my toy, to add a rounded effect (As can be seen in my second attempt at the bottom). This I feel was more of an improvement. 


Personal Thoughts:

Though it was exciting and felt like a breath of fresh air to try and work with a different art style that I am not used to, I have to admit that I was a little underwhelmed by drawing pixel art. However there was one thing that I am annoyed with and that is my choice of colour. The reason for this is because it makes my robot look out of place with the other toys. They have more lighting and similar colours, whilst my one, stands out and is very easy to spot. However my second attempt showed better results by adding more lighter colours and giving it lighting. 

Wednesday 14 October 2015

Life Drawing week 4

It was another try for life drawing and for this session we are going to focus on positioning. For the model, he had to pose for us using a stick and we had to draw him and the stick with pencil and charcoal. (depending on which one we prefer).  This was still challenging for me, but I am getting more used to the human body.


This was once again a good practice for my drawing skills and I am even getting used to drawing the human body, even though I still prefer drawing environments over people.